How To Add Image Texture To A Model In Blender
Learn how to add image textures in Blender, unwrap UVs, and make textures tile cleanly across cubes and extruded road meshes without stretching. Step-by-step for beginners.
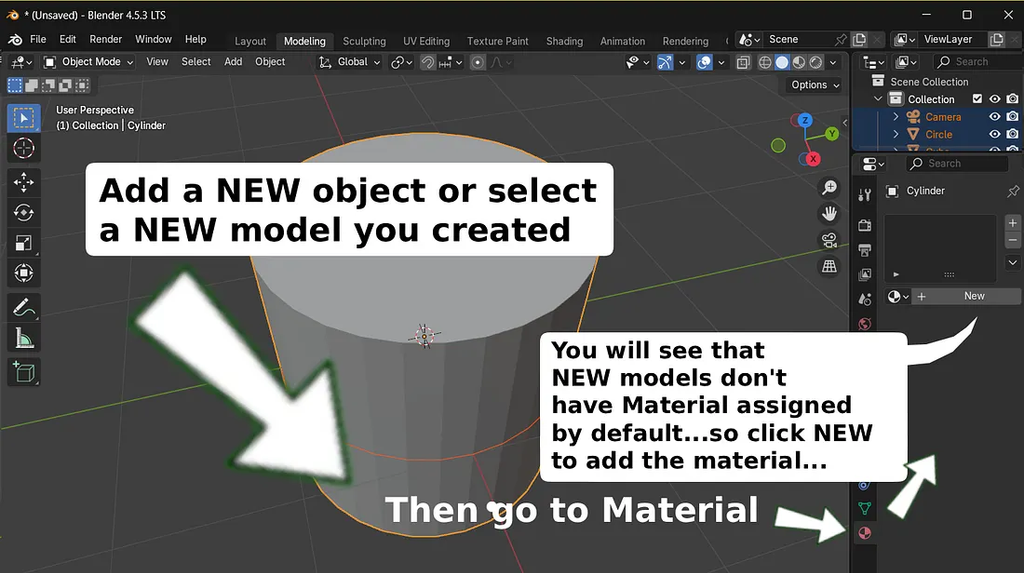
Haha, biggest lesson about putting image textures on stuff in Blender?
Blender doesn’t give you one giant “Add Texture” button to click.
You always start by picking your object, then creating a Material for it.
Only after that do you drop an Image Texture into the material.
That missing first step is why people feel lost - they hunt for a texture tool somewhere else.
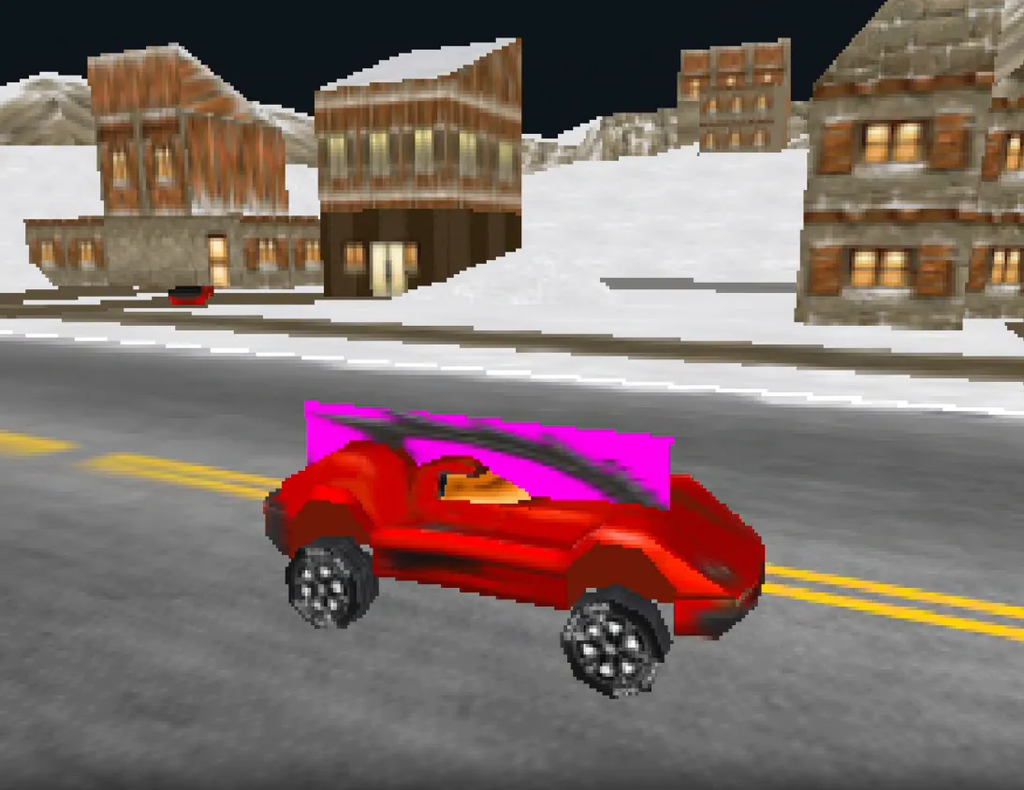
An example of a fully texture-mapped racing track with a road, car (Hey, look it is the Red Eagle from Carmageddon!) and houses. These objects were edited in Blender, with materials and textures added. (It's running in my car physics game engine.)
The Workflow For Adding Texture In Blender
Texturing sounds complicated, but the loop is simple:
- Add a material (the startup cube already has a slot, but new objects usually don’t)
- Add an Image Texture node in the Shader Editor
- Open an image from your hard drive
- Connect the Image Texture to the shader so Blender knows to display it
- Switch the viewport to Material Preview / Rendered so you can actually see it
Once that clicks, textures stop feeling like a secret Blender club.
But let's go over the process step-by-step and watch out for any gotchas!
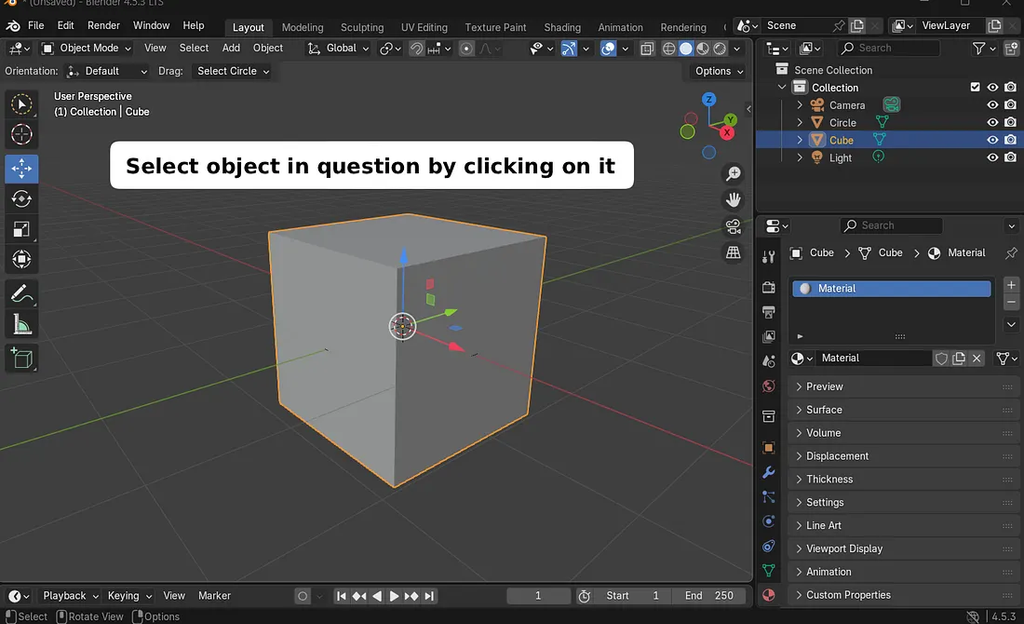
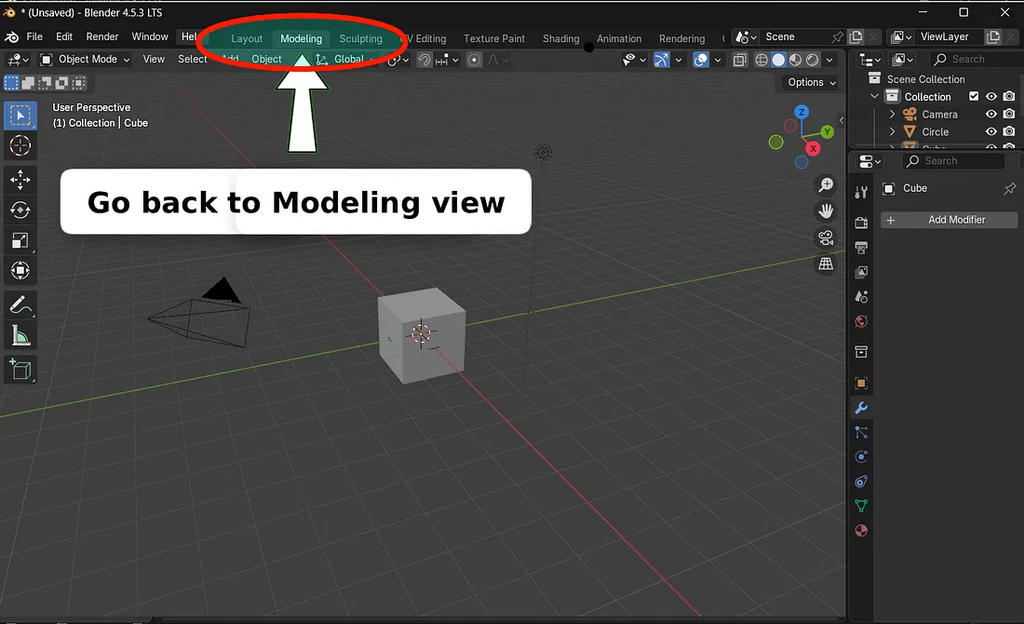
Make sure you're in Object Mode and you select the object you want to apply texture to, by clicking on it:
Add A Material
- In Object Mode, select your object.
- Click your object to select it.
- Go to the Material Properties tab (lower right, Red Sphere icon).
- Click New.
Brand-new meshes don’t come with a material you can texture, so you have to create one first.
If you skip this, the Image Texture node has nowhere to “live,” so nothing shows up on your model.
Add An Image Texture Node
- Switch to the Shading workspace (top tabs).
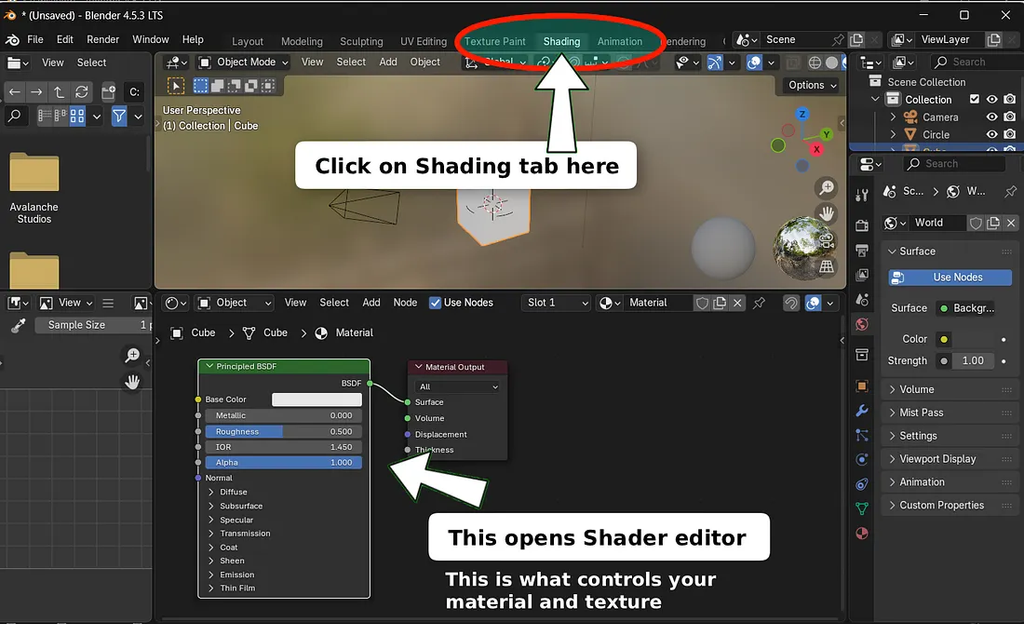
- In the Shader Editor press Shift + A.
- Choose Texture ▶ Image Texture.
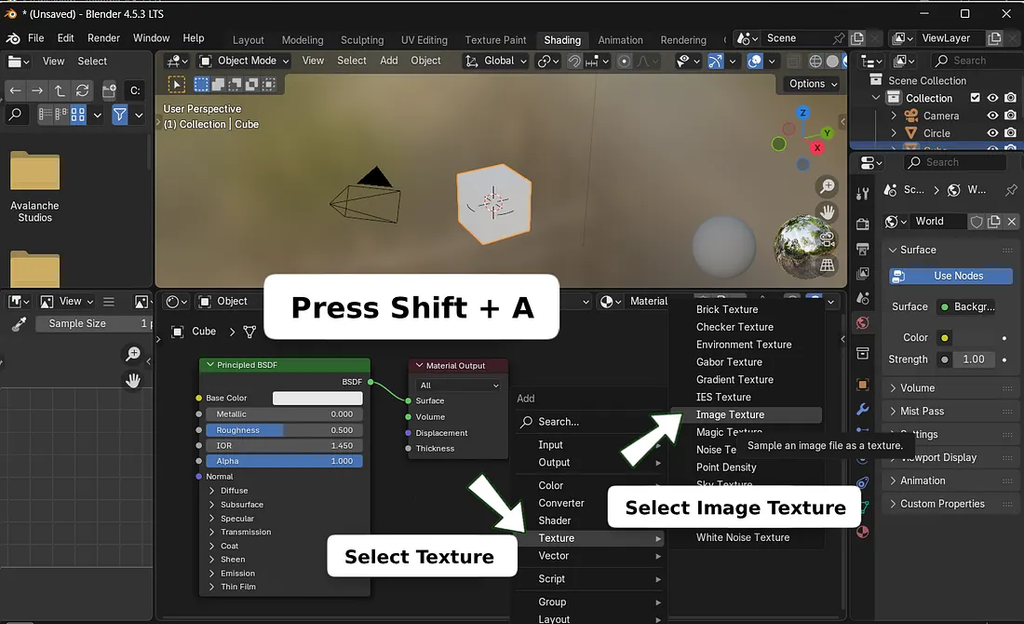
This is what will happen if you press Shift + A and add Image Texture:
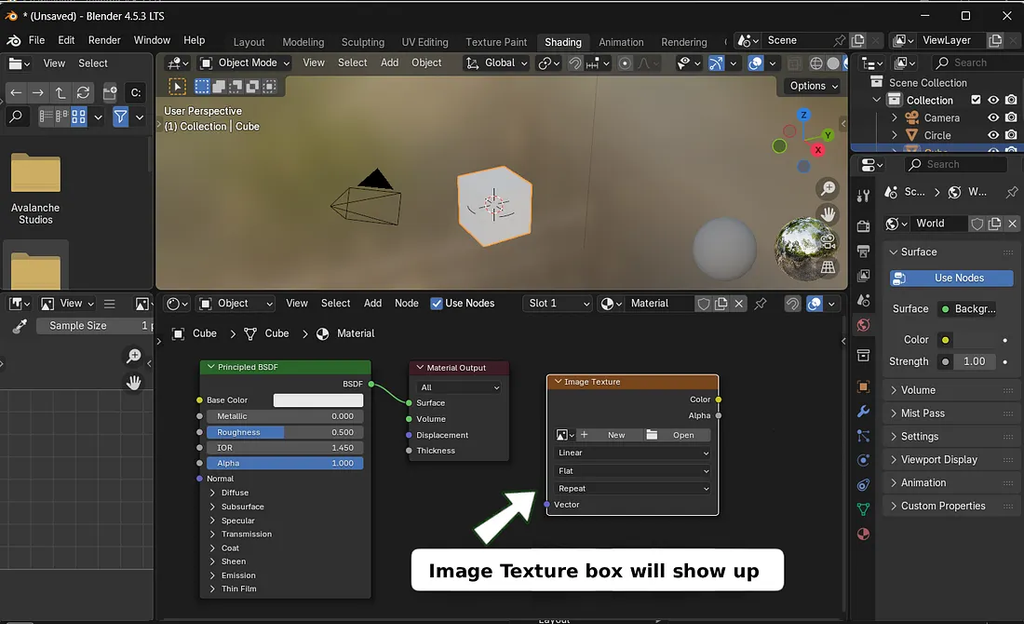
Click Open on Image Texture box and pick an image from your drive:
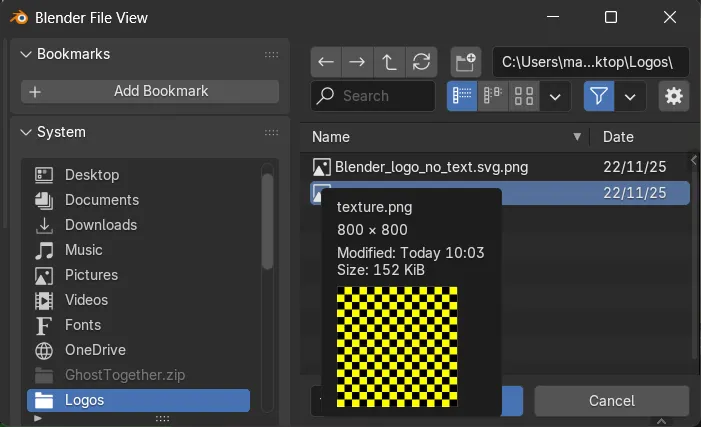
- Click Open and select an image file.
- Connect Image Texture’s yellow Color dot ▶ to ▶ green Surface dot.
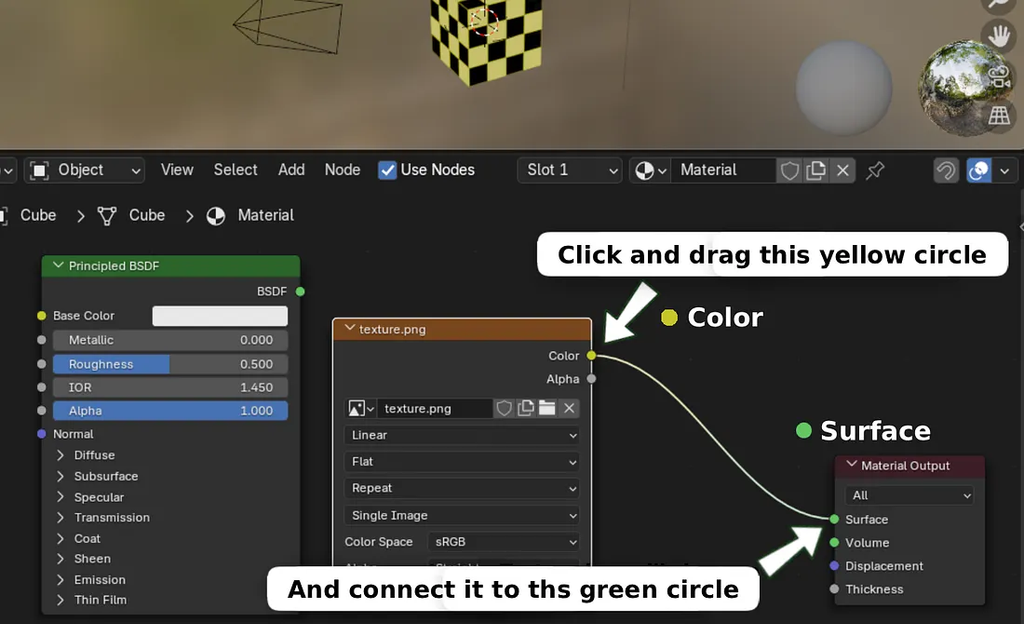
At this point your material contains the image, and the object is officially textured.
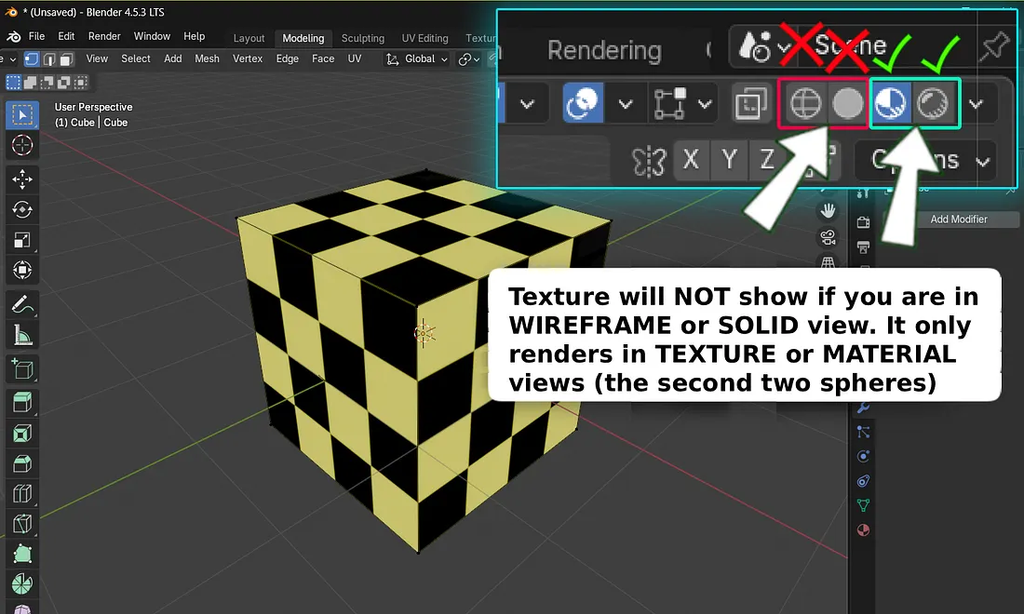
At this point you might wonder why texture is still not showing up.
Simple…it’s because you’re still in wireframe or solid view.
If you’re still in Solid view, you won’t see the texture there. That’s normal.
But you need to switch to Textured or Material view:
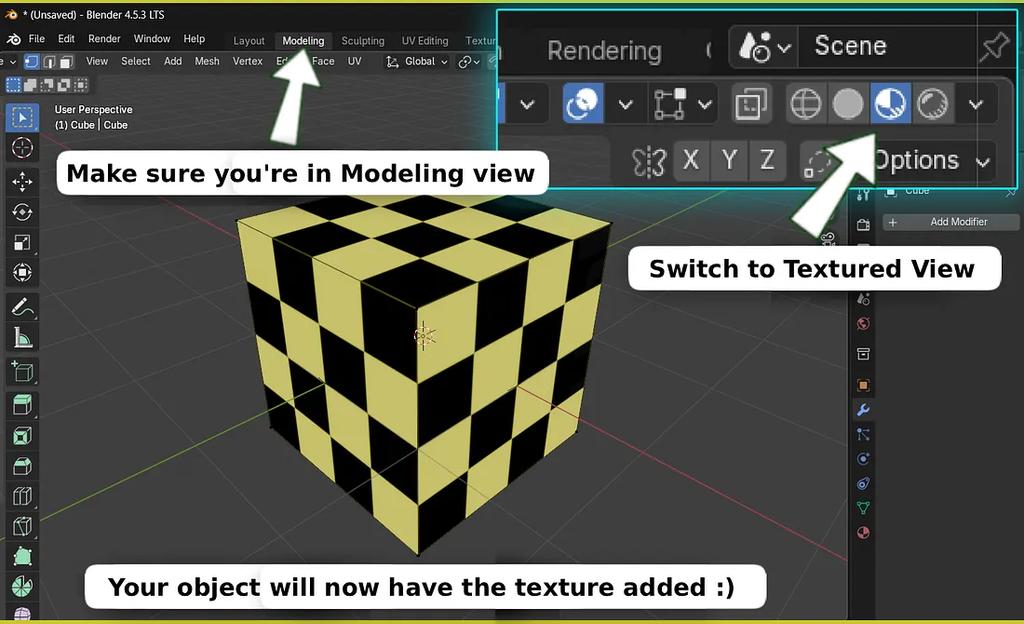
That’s it!
You have just added image to object’s material.
Press Enter or click to view image in full size.
If It Looks Wrong, UV Unwrap
When a texture looks stretched, scrambled, or “random,” that’s almost always UVs.
- Go to Edit Mode (Tab).
- Select all faces (A).
- Press U.
- Pick Smart UV Project for weird shapes, or Cube Projection for boxy ones.
- Open UV Editing to see the islands.
UVs are just your model flattened into 2D so the image knows where to land.
Adjust Scale / Rotation (When Needed)
Sometimes everything is correct, but the image feels too big, too small, or turned sideways.
- In UV Editor select all UVs (A).
- Press S to scale until the image density looks right.
- Press R to rotate if the texture is sideways.
- Press G to nudge UVs into place.
You’re not changing the picture — you’re changing how the picture wraps your model.
Common Quirks + Mistakes
These tiny mistakes cause 90% of “Blender textures are broken” moments.
- You’re still in Solid View, so textures are hidden. Use Material Preview.
- The Image Texture node isn’t connected to Base Color.
- You loaded the image into Roughness/Metallic by accident instead of Base Color.
- The object has no UVs, so Blender smears the image across it.
- You’re editing the wrong material slot on a multi-material object.
- You duplicated something and didn’t realize the material is shared.
Quick Troubleshooting
Texture is one flat color or not visible.
- Confirm Image Texture “Color” ▶ Principled “Base Color”.
- Switch viewport shading to Material Preview / Rendered.
- Make sure the correct material slot is selected on the object.
Texture looks stretched / warped / chaotic.
- UV unwrap (Edit Mode ▶ A ▶ U ▶ Smart UV Project / Cube Projection).
- In UV Editor, scale islands so none are tiny or huge compared to others.
- Add geometry if the mesh has extreme long thin faces.
Texture looks blurry.
- Use a higher-resolution image.
- Set Interpolation to Closest for pixel art, Linear for photos.
- Don’t scale UVs so far that one tiny part of the image fills the whole model.
Texture repeats when you didn’t want repeats.
- Keep UVs inside the 0–1 square in UV Editor.
- If UVs go outside that box, Blender tiles the image automatically.
- Re-unwrap or scale UVs down to stop tiling.
Colors change between preview and final render.
- Set Color Space to sRGB for color images.
- Use Non-Color for maps like Roughness/Normal/Metallic.
- Remember lights and world color change how textures appear.
Done!
You’ve got an image texture on your object, and you know the usual reasons it might look wrong.
If something still acts weird, show a screenshot of your Shader nodes and UVs, and I’ll point to the exact fix fast.
